
Photo by Holly Webb
Today we learnt more about the exposure triangle and the other elements you can control in manual photography. We had already touched on aperture and how it affects the focus of an image, so today we looked into shutter speed and ISO. These are my notes from today’s seminar:
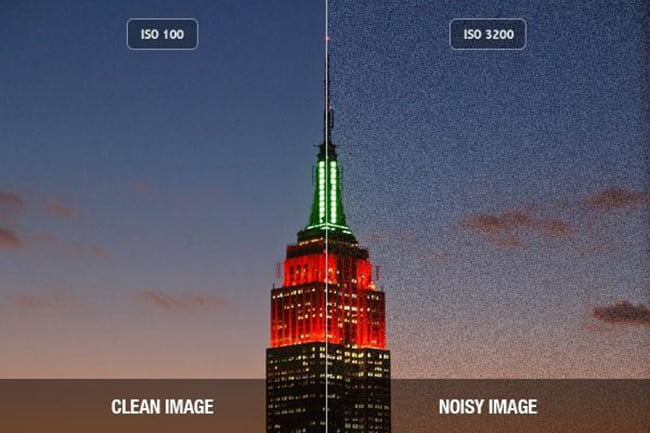
ISO
ISO changes the brightness of an image, but affects the noise.
The term ISO comes from when we used film cameras, but now it’s used to determine the light sensitivity of your camera sensor.
Your ISO should normally be set to 100-400.
Lower ISO is best for shooting outside (100-200) and higher ISO is best for inside (200-400 if it’s well-lit, 400-800+ if poorly lit).
With ISO settings higher than 800, you’ll get grain known as noise. See examples below:
Shutter Speed
Shutter speed measures how long the shutter is open when taking a picture. How long the shutter is open therefore dictates how much light manages to get into the picture.
The longer the shutter is open, the more movement the shot captures. For example in this picture:
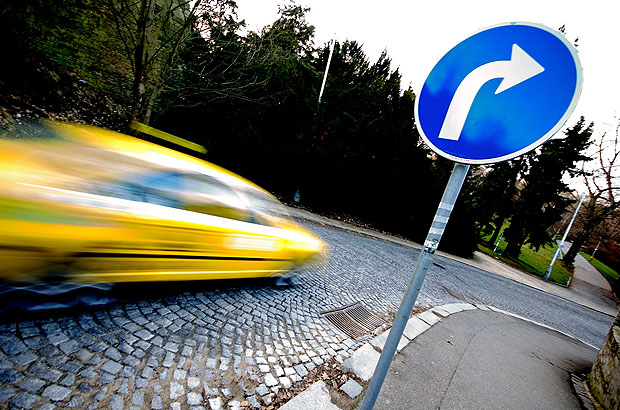
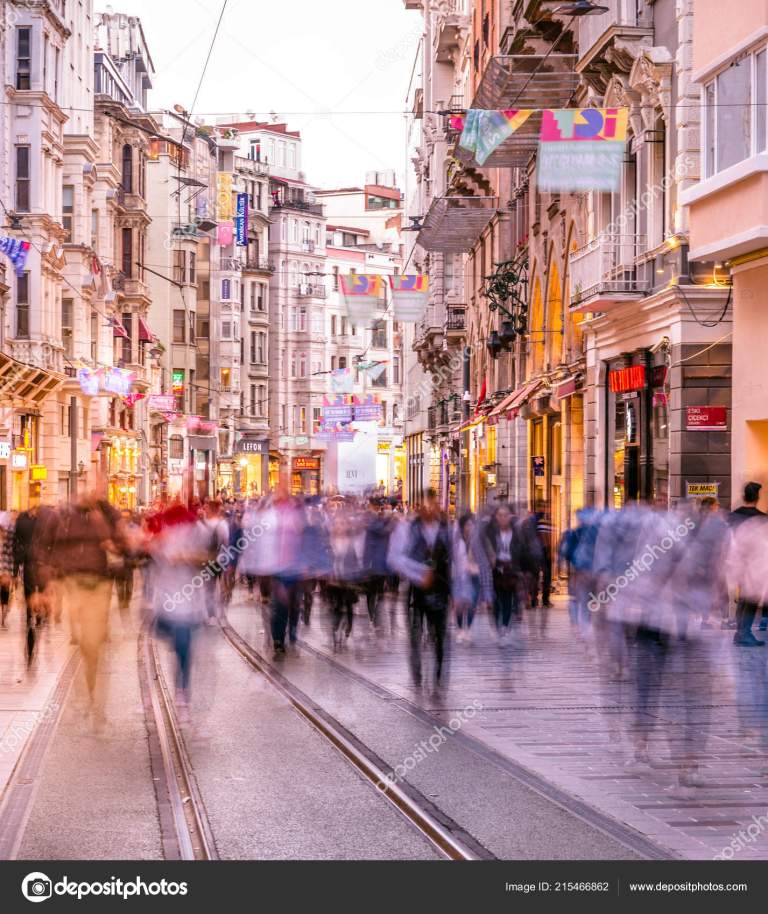
It also controls how much light hits the sensor, as the longer the shutter is open for the more light gets in.
To get the right exposure, you have to balance both ISO and shutter speed with aperture. Working in Auto does this for you, but leaves little control over your image.
Our task for this week was to experiment with the different shutter speeds and ISO and see how it affected the images. To see the images I took, click here.

One thought on “The Exposure Triangle”